

I picked up this little 3 drawer wooden crate from Joann Fabrics months ago and finally got around to playing with it. I don’t remember how much I paid for it but I got it during a half off unfinished wood sale and used a 20% off coupon, so it was under $20. You can’t beat that for personalized storage!

I’ve laid my ruler on it so that you can see it is a small crate. It’s only about 18 inches high but perfect for what I wanted to use it for…lace storage.
A couple years ago, I created this box (also an unfinished wood item from Joann Fabrics) and I knew that I wanted this storage crate to match.


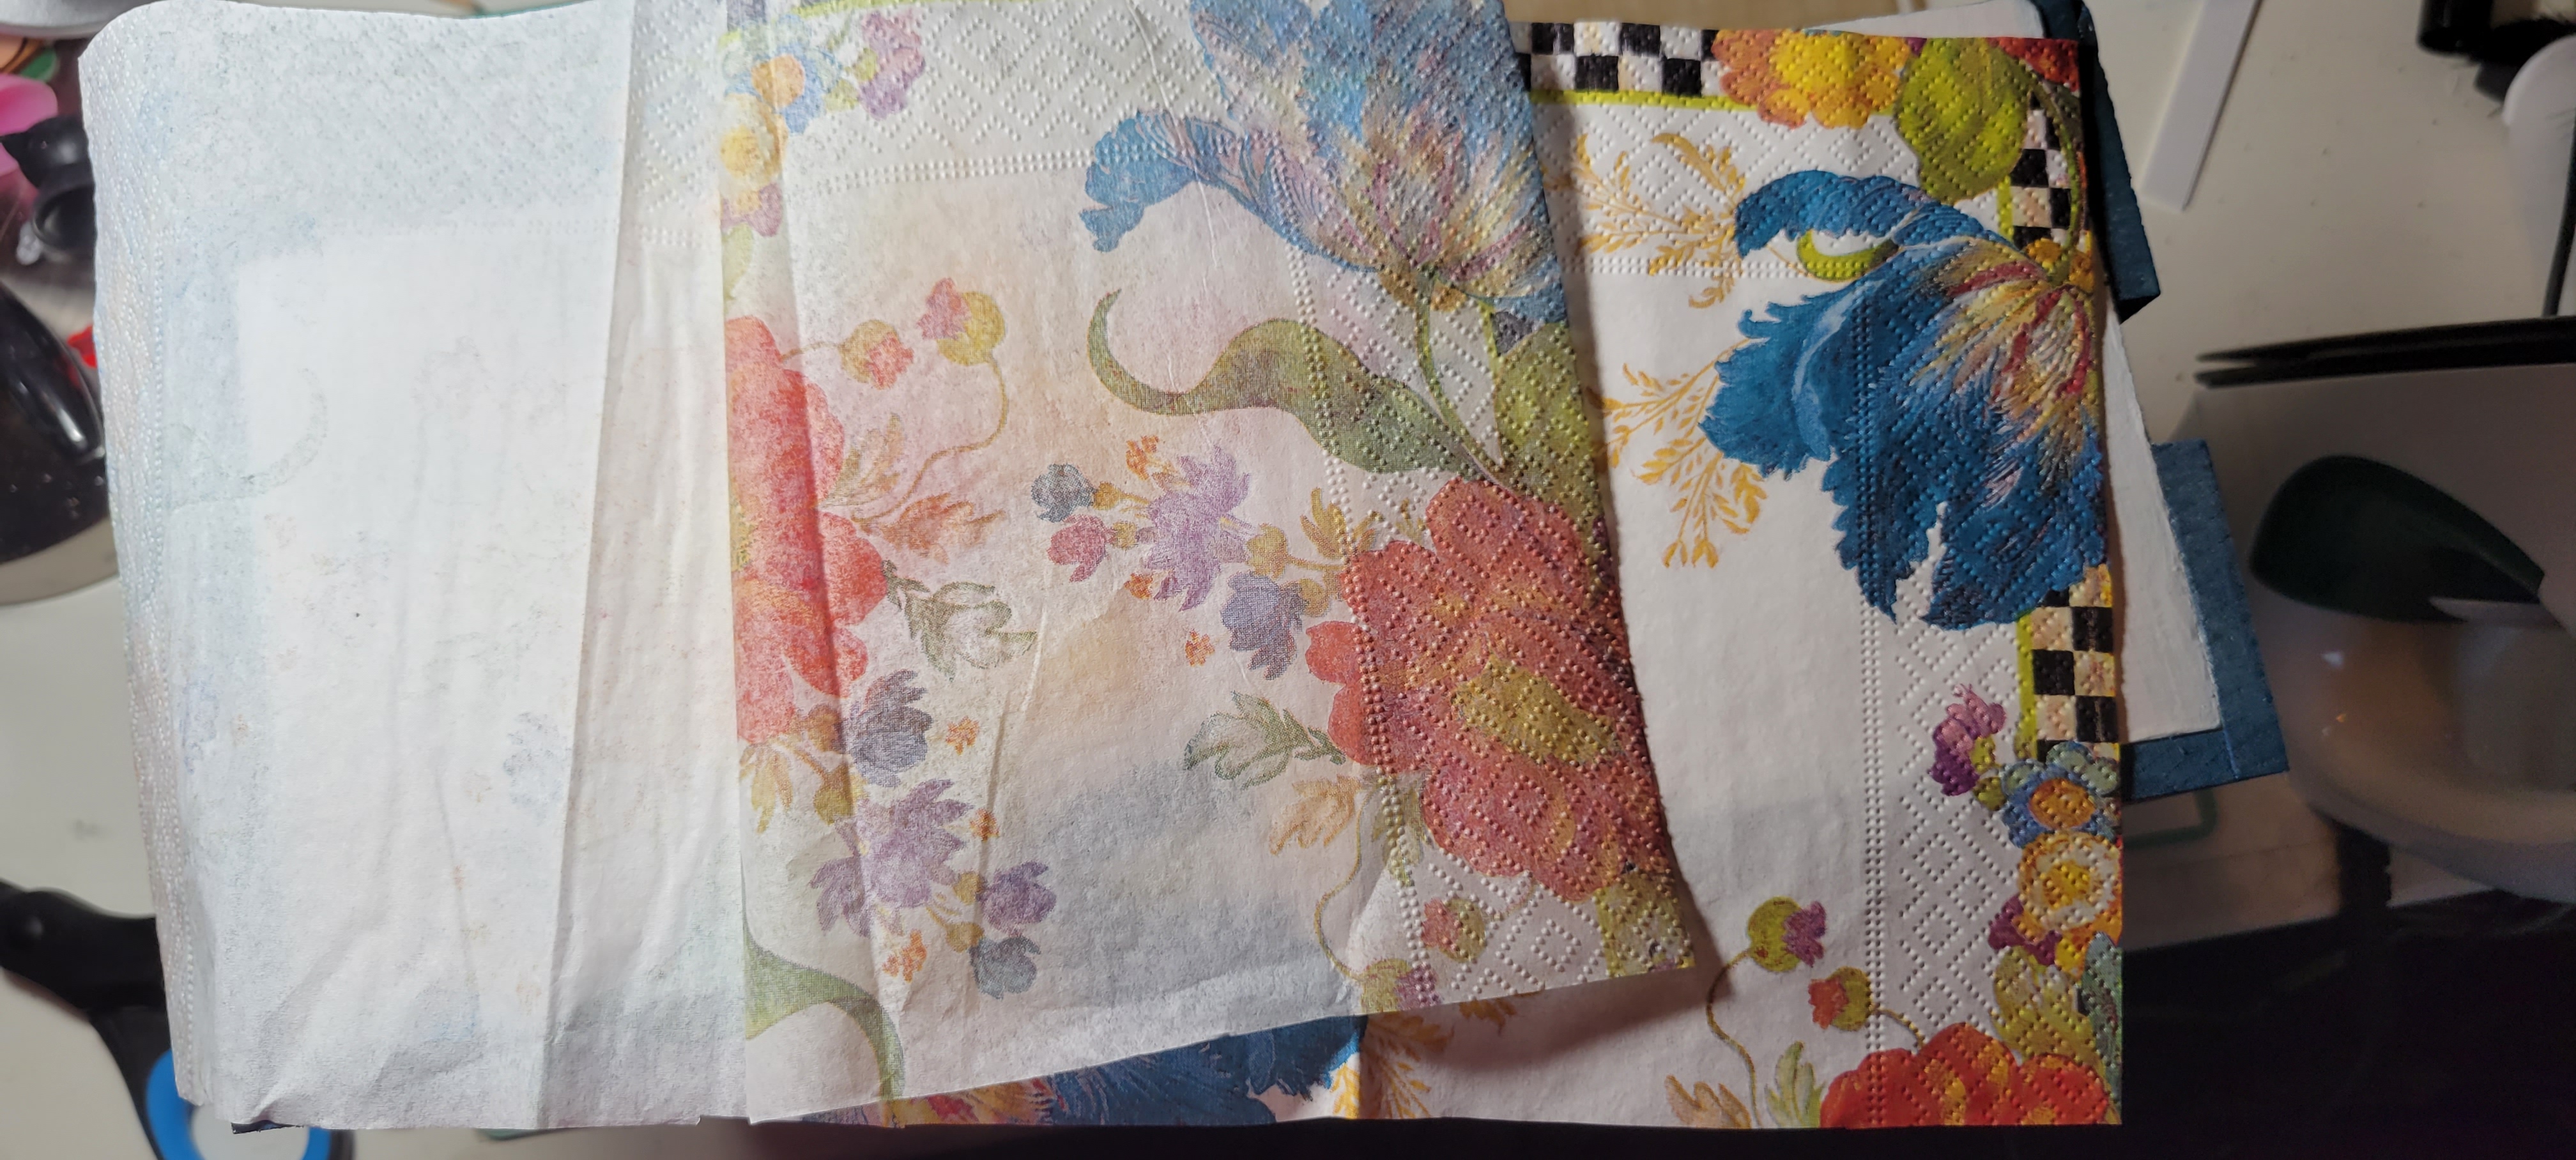
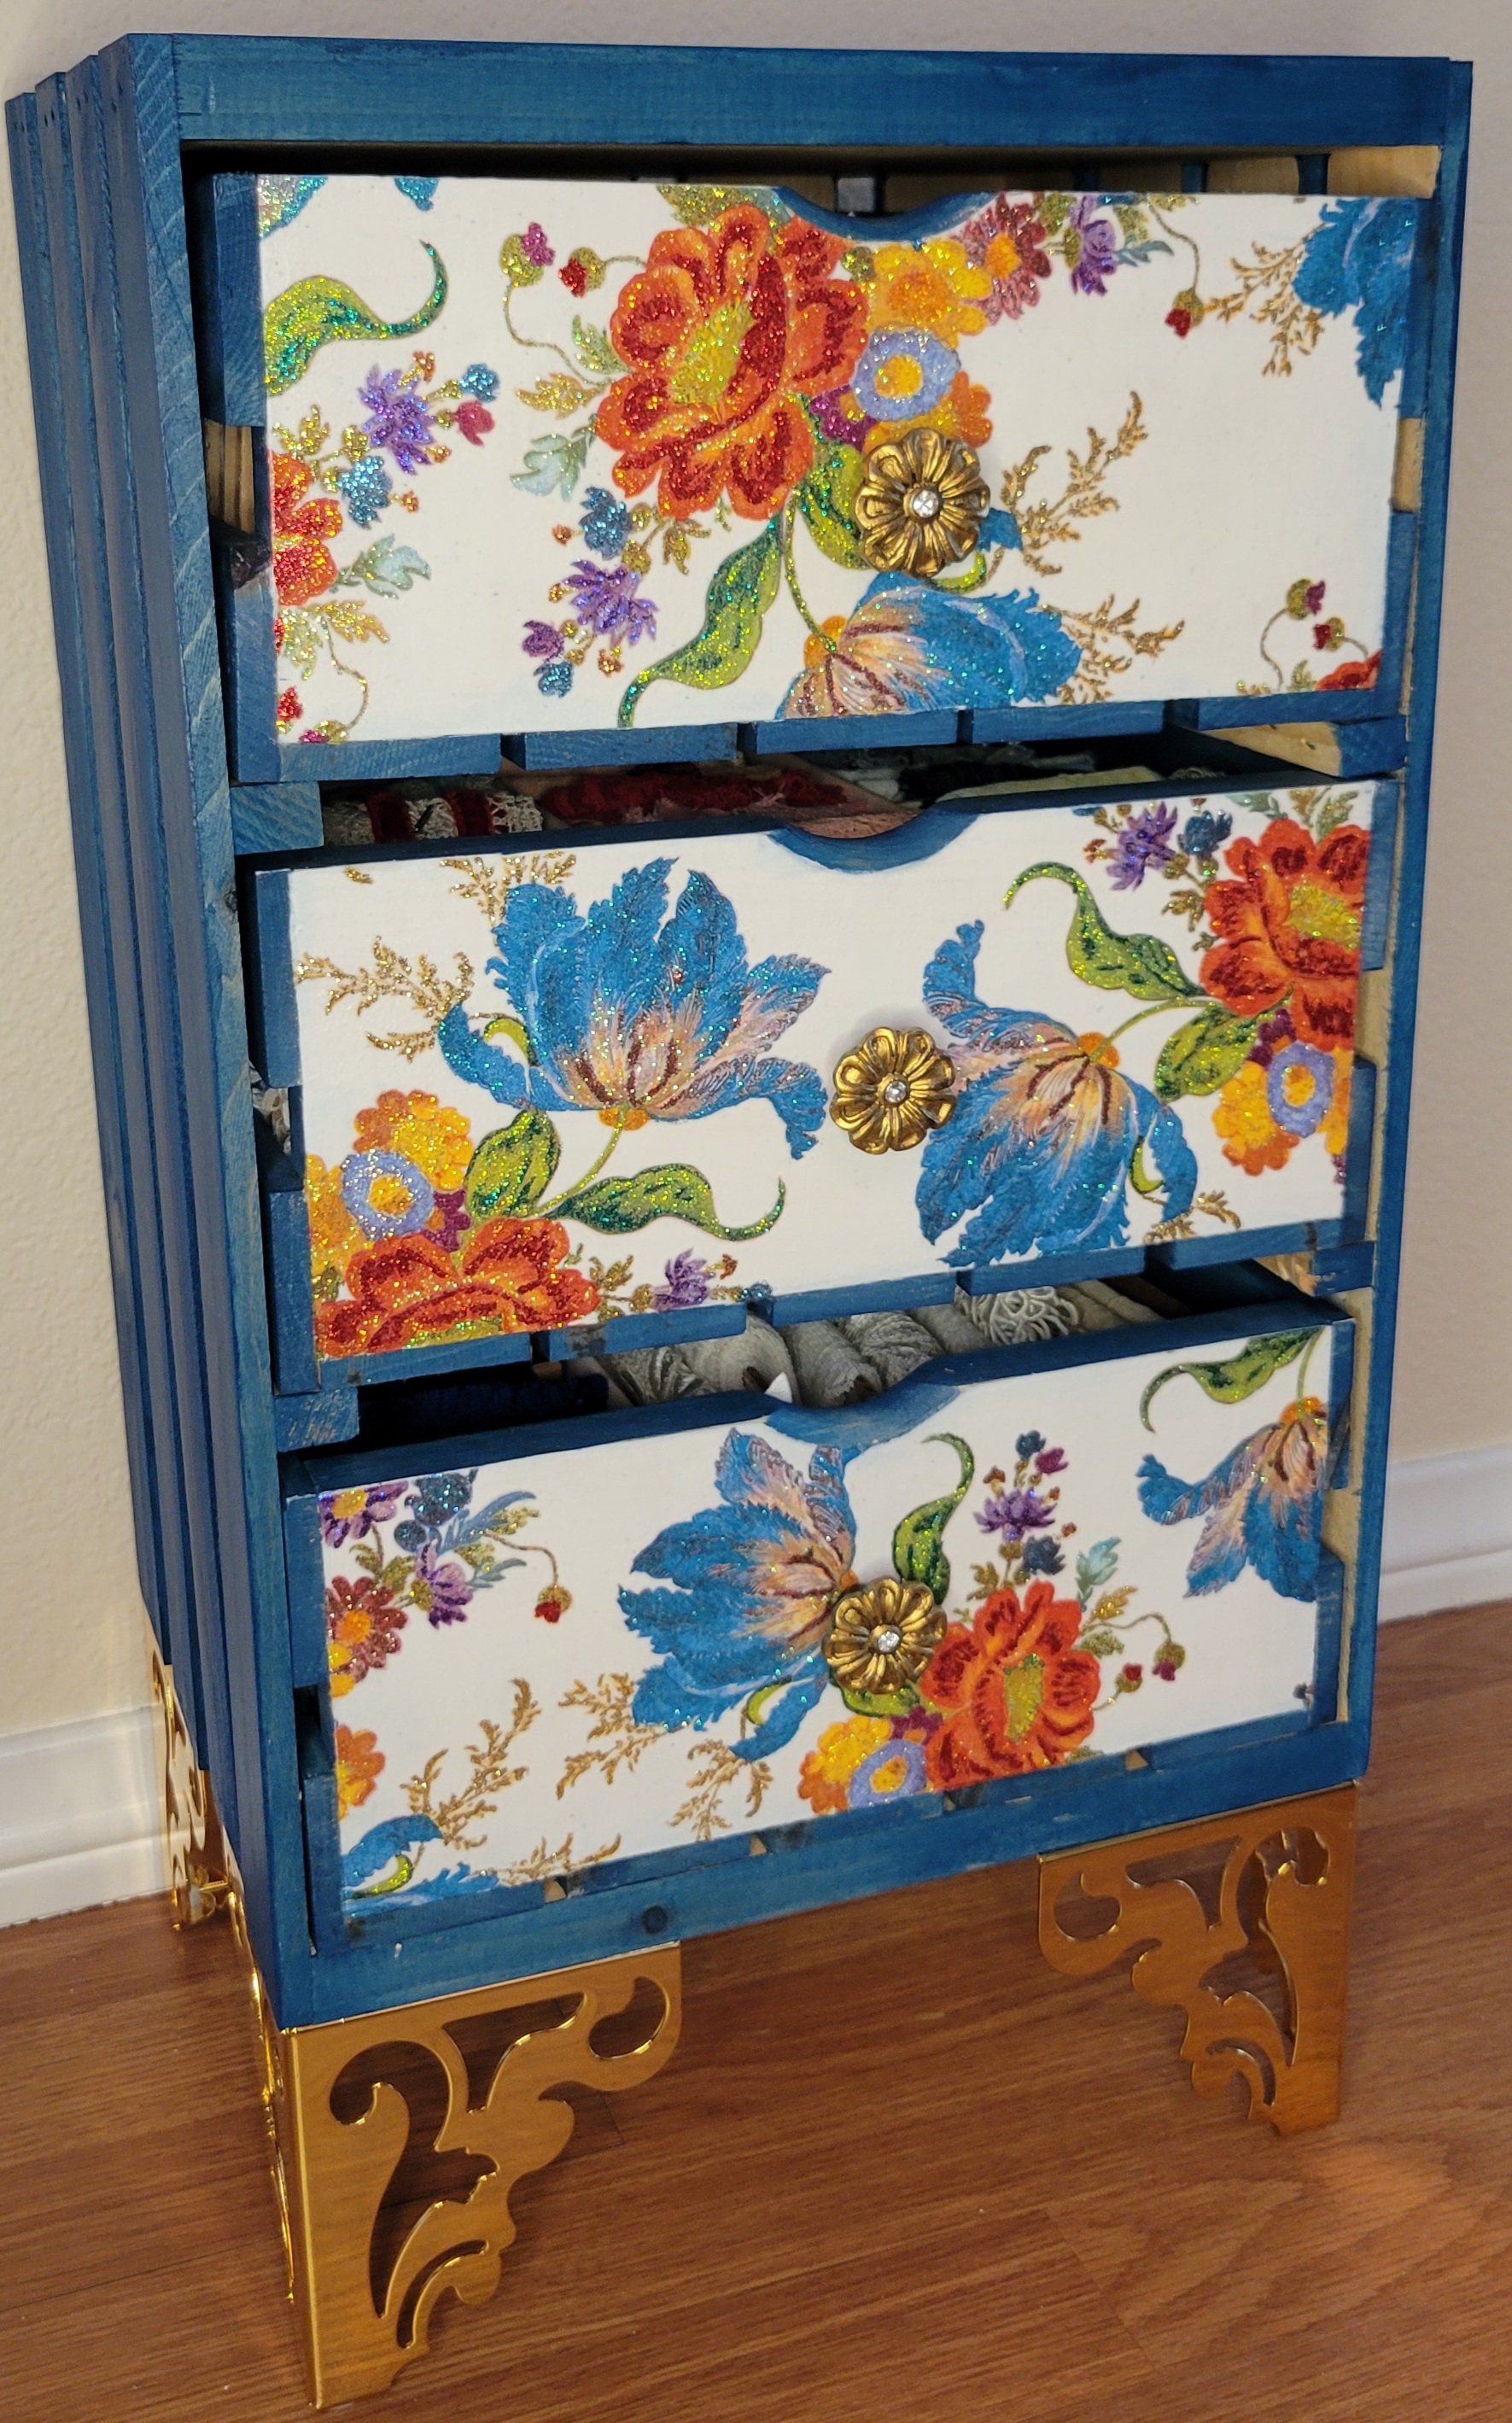
The top is decoupaged with MacKenzie-Childs Floral Market napkins and the bottom is stained with DecoArt Color Stain in Turquoise.


I started by taking out the drawers and sanding down the whole crate. I did not sand the inside of the crate because I did not plan on staining it. However, if this was going to be a gift for someone else, than I would’ve taken the time to do that. Since it was for me, I wasn’t worried about it. In the final pictures you can see some unfinished wood peeking through. If you don’t want that, make sure to stain the entire piece.


I used 3 coats of the stain to get the depth of color I wanted. On the drawers, I only put one coat of stain. I wanted them to have color but since they won’t really be seen, they didn’t need to match perfectly. Here you can see the difference.


Try your best not to get any stain on the front of the drawers. The little bit that I did get on there was difficult to cover. Now it’s time to decoupage!
I started by painting the front of the drawers with white acrylic paint. It took 3-4 coats for me to get a nice even finish and cover the little bit of stain I got on them. After they’re dry, give them a light sanding. You don’t want to sand off the paint, you just want to sand it to be smooth and get rid of any brush marks. We’re going to be using the iron decoupage method for this project. Put on two coats of a decoupage or PVA glue. I used Mod Podge. Once they’re dry, get your napkin, tissue paper, or whatever you want to use and put over top. If you are using a napkin, make sure to separate the plys. The napkin I used was a 3 ply napkin so I gently lifted the top ply away from the other two. You only want to use the pretty ply.

Next you will need an iron and parchment paper. It must be parchment paper! If you use wax paper, it will leave a waxy film on your iron which will turn brown and gross. (Don’t ask me how I know that😜)
Once you’ve got your napkin in place, put the parchment paper over top and press the iron down onto the parchment paper. Make sure to use a hot iron with NO steam. I like to start in the middle and work out towards the edges. The edges are very important. You want to make sure you have a good seal. After a few moments, lift up the parchment paper and make sure everything is sealed down nicely. Remember to double check those edges. If they’re loose, hit them with iron again.

I used a razor blade and sandpaper to carefully remove the excess napkin around the edges. I also added another layer of Mod Podge on top of the napkin to seal it in really well.
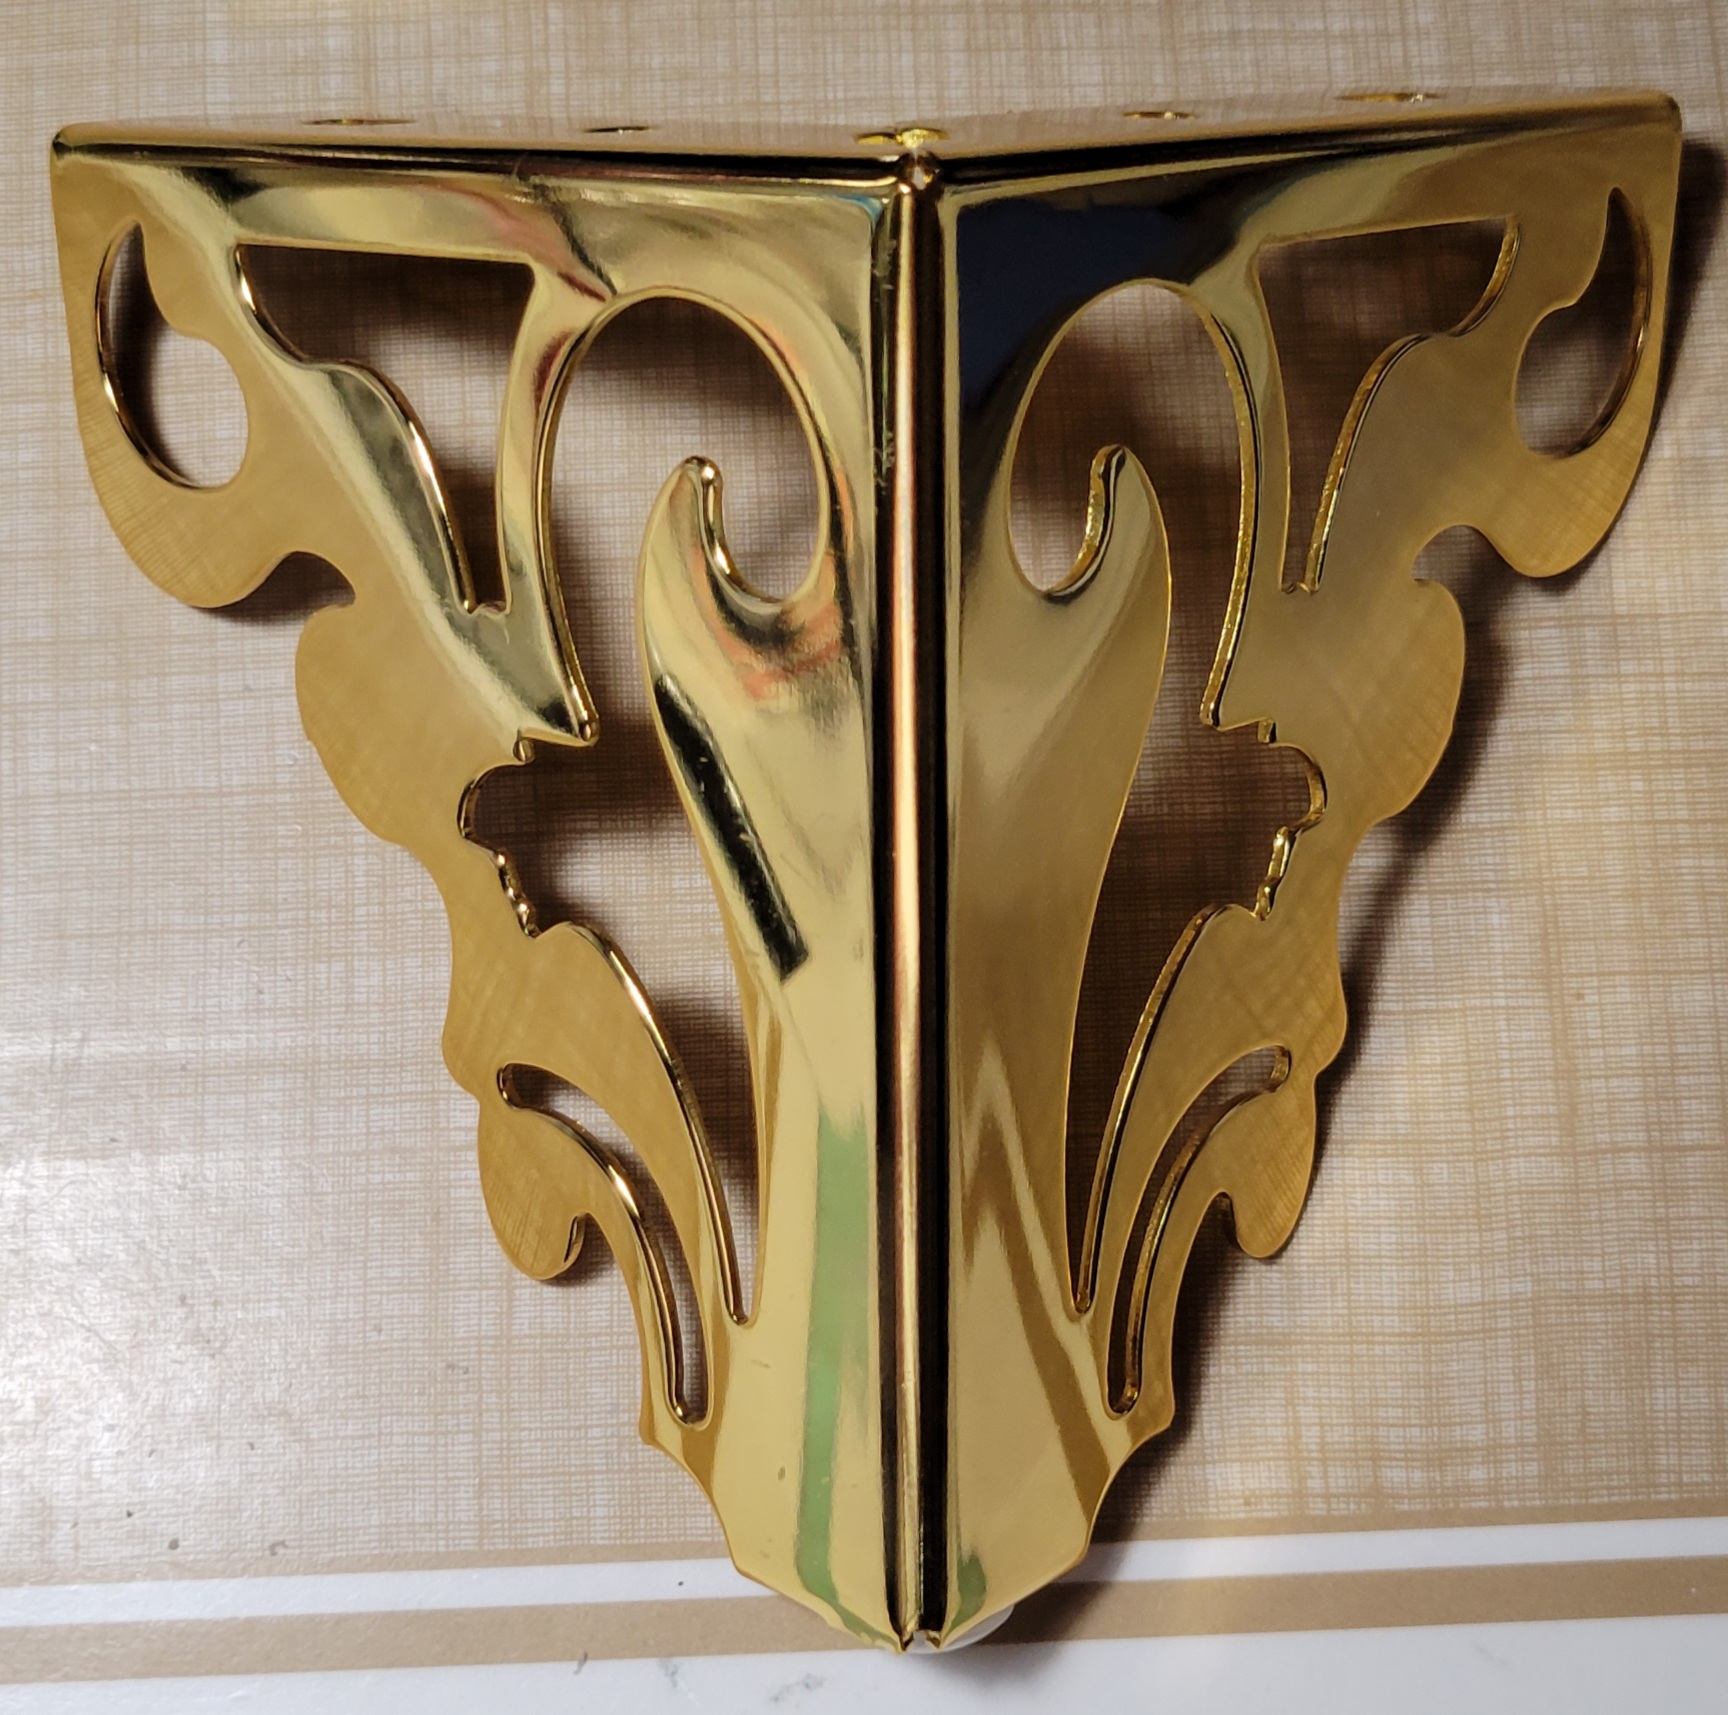
I had some drawer knobs from Hobby Lobby that I wanted to use but I needed them to be gold to match the feet (more on that later), so I just used some gold paint to cover the metal.

Before adding the drawer knobs, I needed to add glitter. I don’t think you can tell from the pictures, but on the original box I covered all the flowers in Stickles Glitter Glue, matching the colors as best as I could. I just love things that sparkle! I had to do the same to crate. Here you can see some of the sparkle. It’s so much prettier in real life. Very dramatic.


After all the glitter glue was dry, it was time to add the knobs. I decided to simply glue the knobs down using E6000 glue. Again, if this was a gift, I would drill the hole and properly insert the knobs. I wanted my knobs to be simply decorative. I had planned on using the little dip at the top of the drawer when opening and closing. But over the last few days of using this piece, I have noticed that I use the knobs without even realizing it. Right not, they’re holding up fine but if they fall off in the future, I will definitely drill the hole and secure them properly.


The piece is almost done. We just need to add the feet that I mentioned earlier. Since this crate is only 18 inches high, I wanted it to sit a little higher off the ground. I thought about going to Home Depot or Lowes to see what kind of furniture feet they had but decided to check Amazon first. Amazon really does have everything! They had all types of feet. Wooden, metal, acrylic and in all different heights, sizes, and designs. I decided on these 5 inch high gold metal feet. They even have the little rubber piece on the bottom so it doesn’t damage your floors. I’m already looking around the house asking myself “what else can I add beautiful feet to?” 😂

Using the screws that it came with, I secured the feet onto the bottom of the crate.

And it’s done!
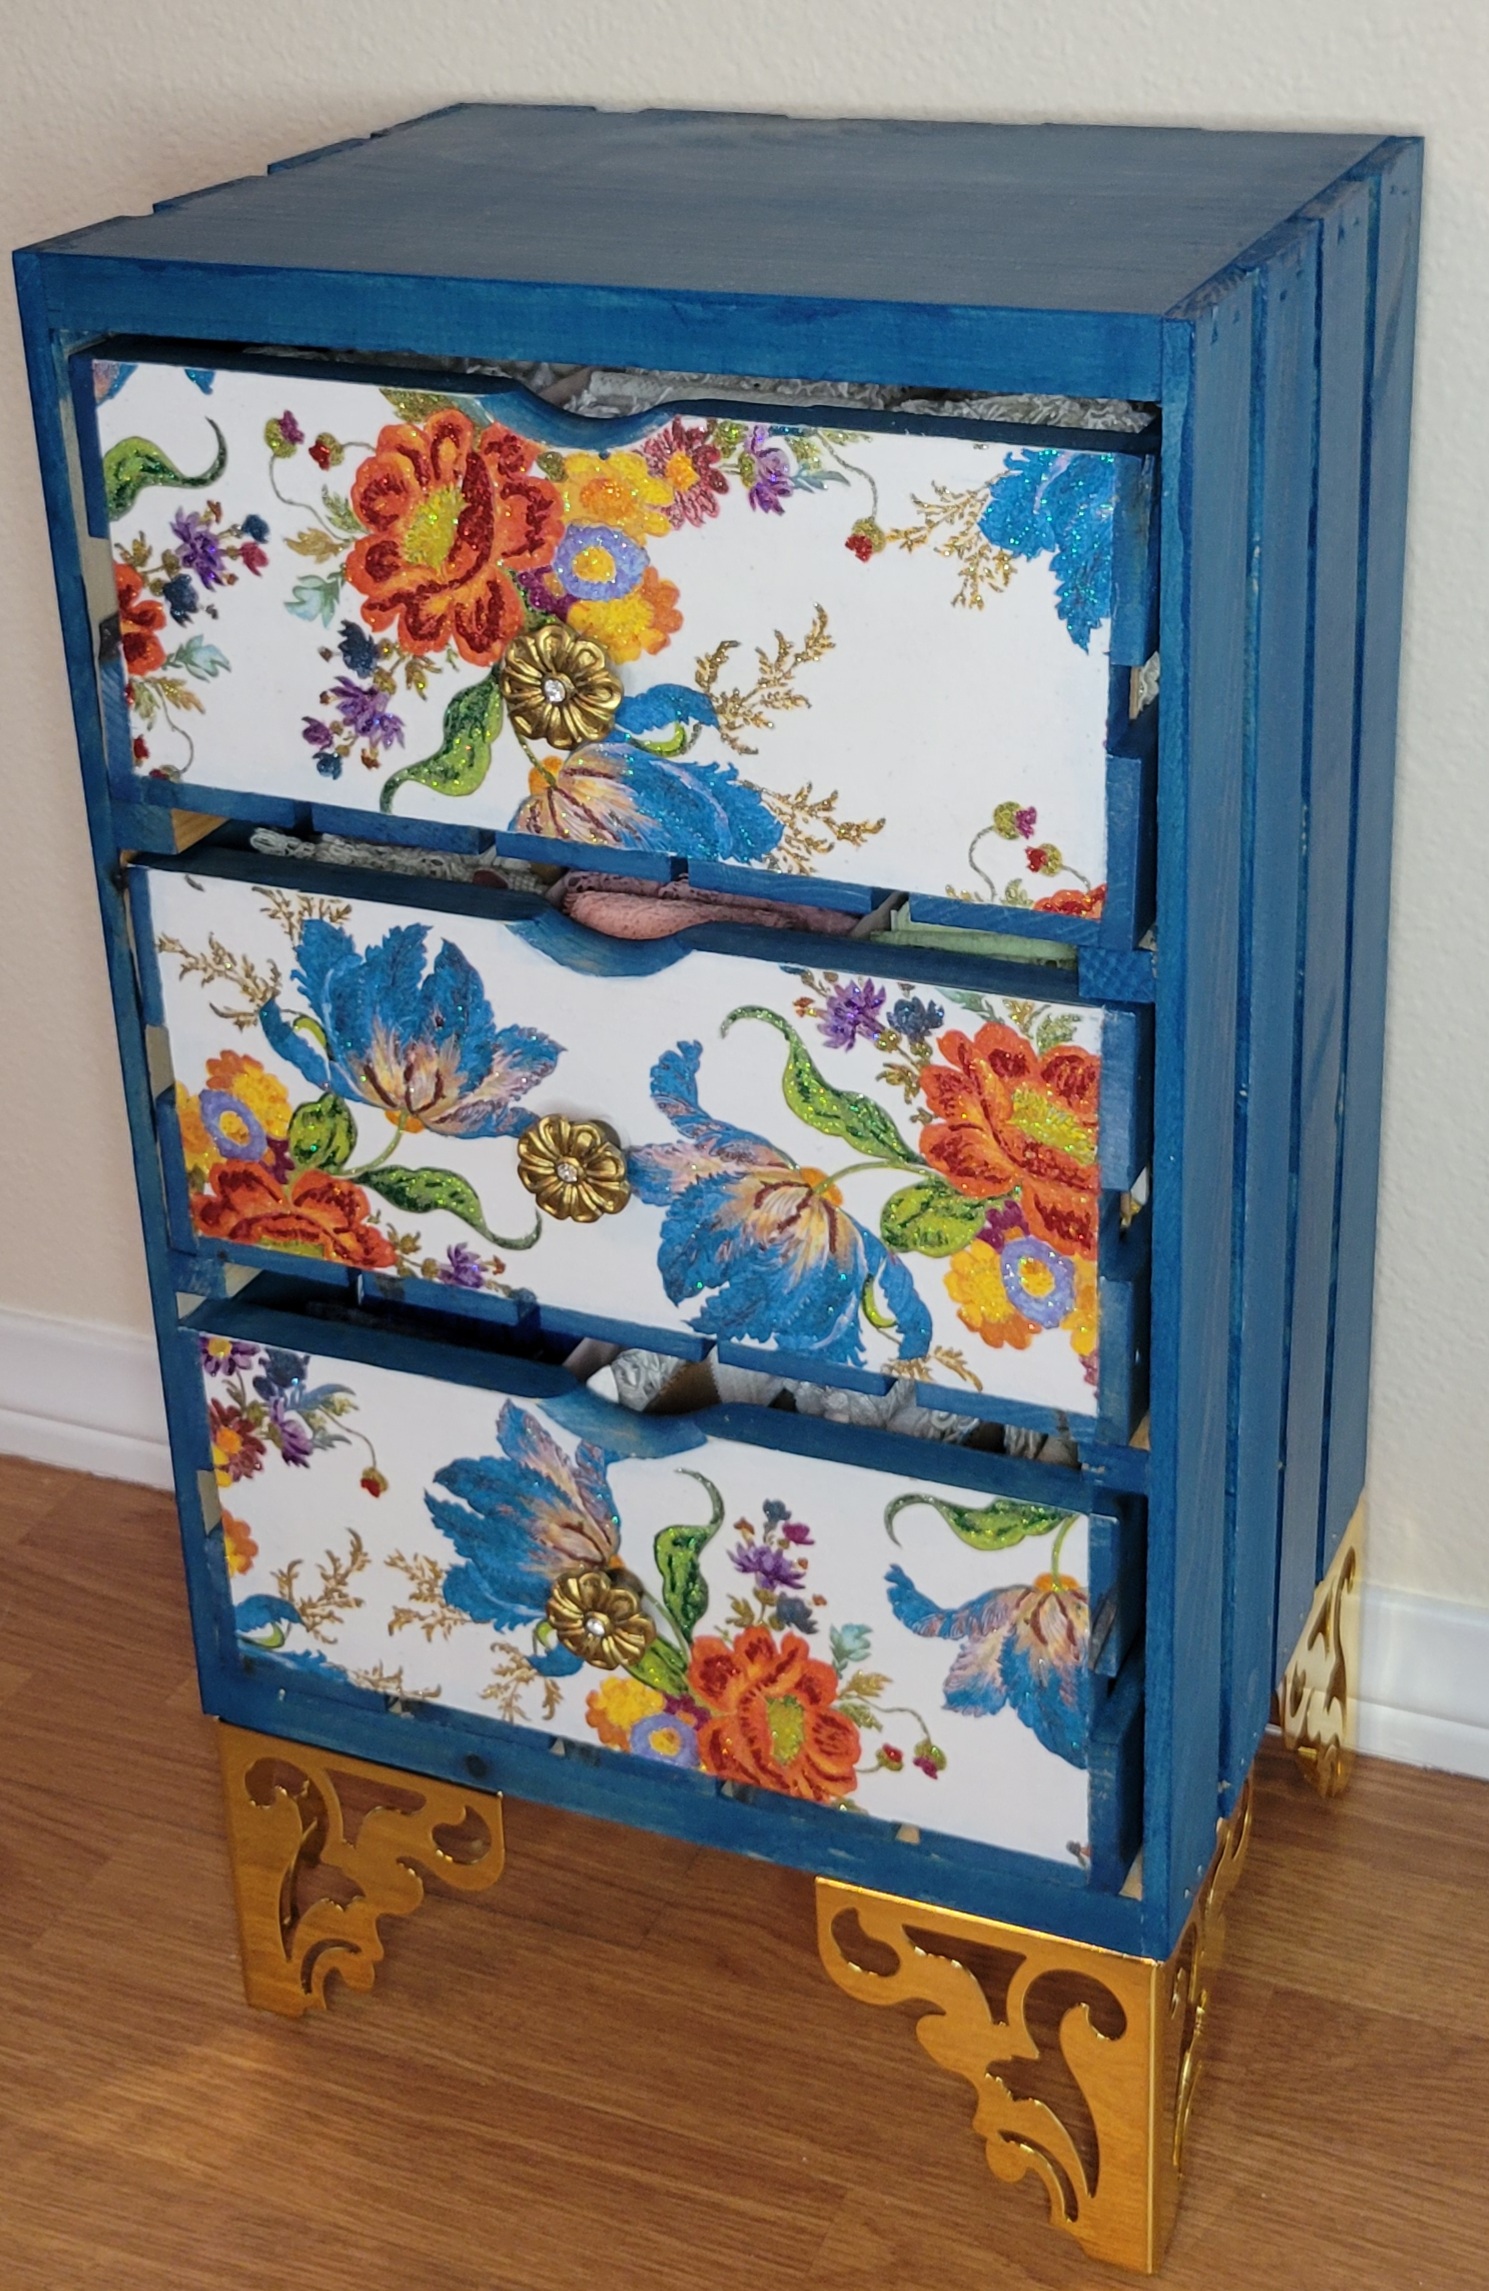


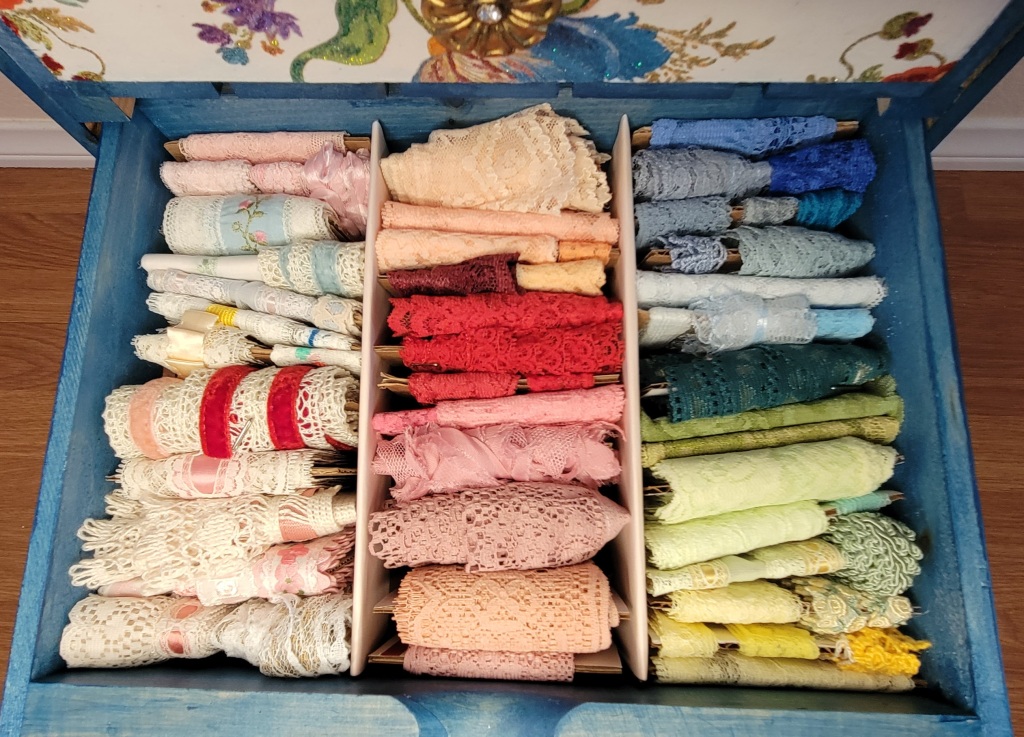
I was able to organize all my laces and they fit perfectly in the three drawers.


Now my beautiful box doesn’t have to be hidden on a shelf anymore. It sits right on top of the crate in my craft room.

I love the way this turned out and I hope you found some inspiration along the way. Happy crafting!
